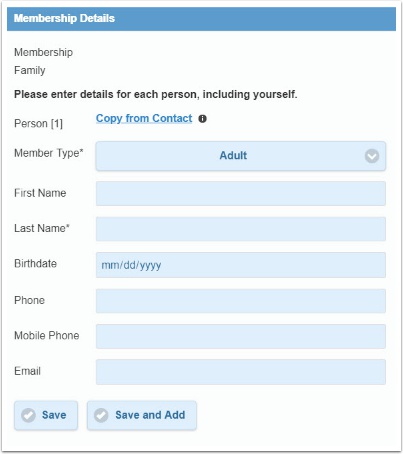
This feature allows multiple contacts to be grouped under the one membership. This is useful for households all family members are linked under a common reference or grouping of people within an organisation under the one subscription.
Subscriber Groups requires the background processor to be used and override contact values to be setup on the Merchant Faciltiy. For more information on the background process, see: How does the Batch Payments Processor work
When Subscription Groups are enabled, the Checkout will prompt users for each subscription group (family) entry.
When renewing a membership/subscription, the Subscriber Group members will be pre-populated and can be amended.
Various (configurable) member types are supported such as “Adult”, “Child” etc. Maximum numbers of a particular member type and number of voting rights are supported at each member type level.

The Merchant Facility tab can be found within the Payments2Us menu (Top right picklist in Salesforce - Select Payments2Us), or it can be found under the "More" at the end of the tabs. (In Salesforce Classic - It can be under the "+" at the end of the tabs)
Once you have clicked on the Merchant Facility Tab, select the appropriate List view (Example - "All Merchant Facilities") and click into Merchant Facility you wish to update.
2. Select Payment Forms and select the online form that will be used.
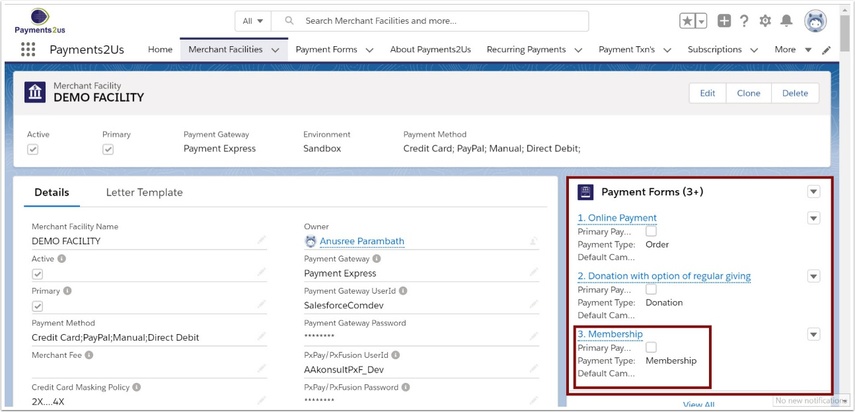
Classic - Scroll down to Payment Forms heading and select the online form that will be used.
Lightning - Select the Payment Forms from right tab and select the online form that will be used.
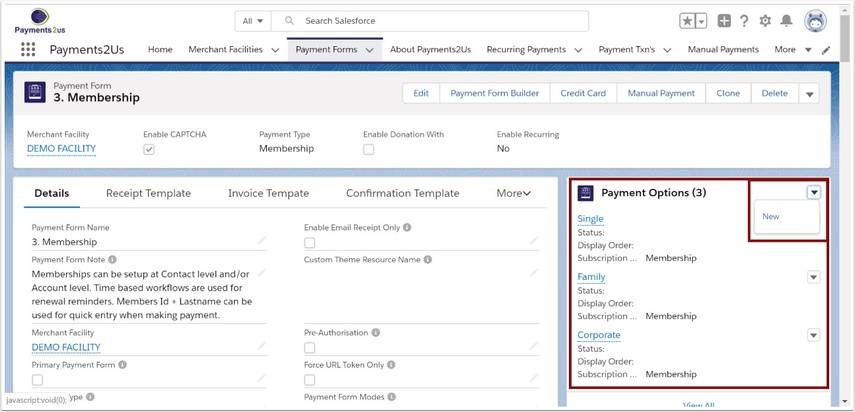
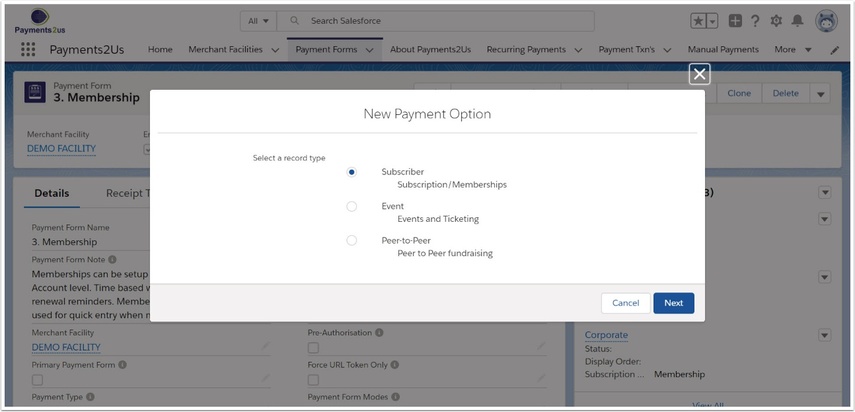
5. Fill in the details (part 1)
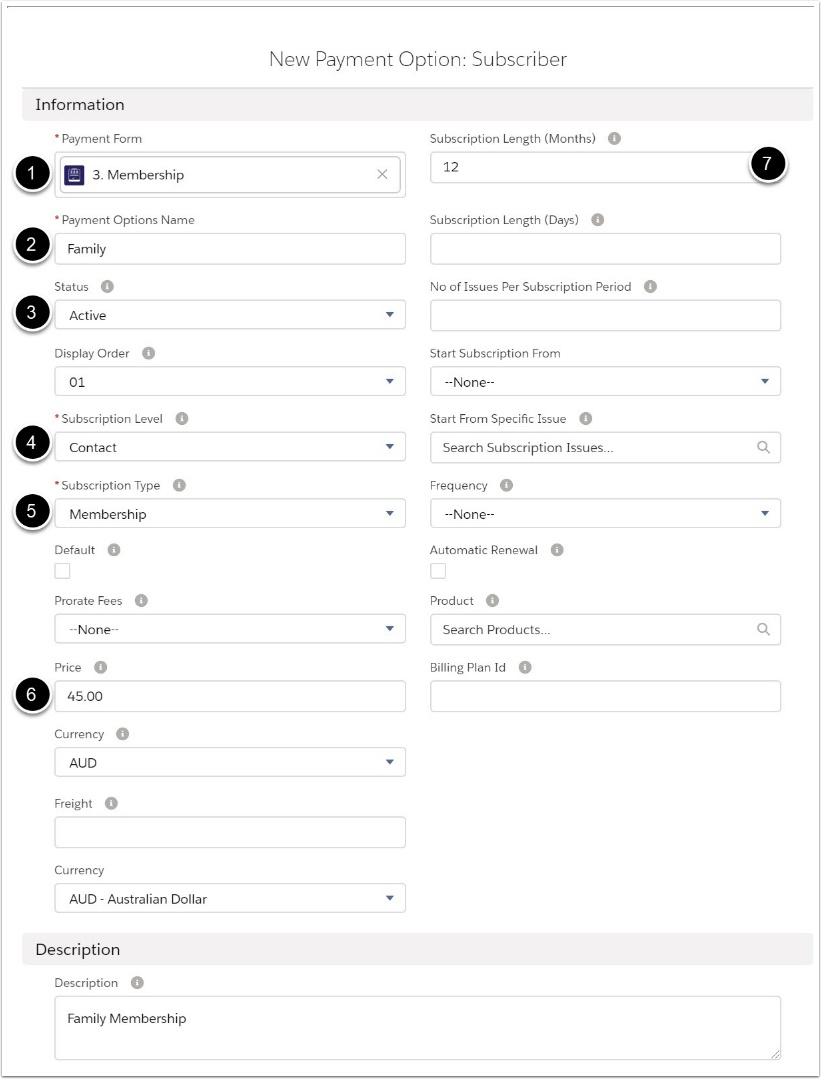
- Link to the web payment form
- Create a unique name for the grouping
- Ensure the status is Active
- Keep the subscription to Contact (individual)
- Choose the subscription type
- Allocate pricing information
- Allocate term of subscription/membership
6. Fill in details (part 2)
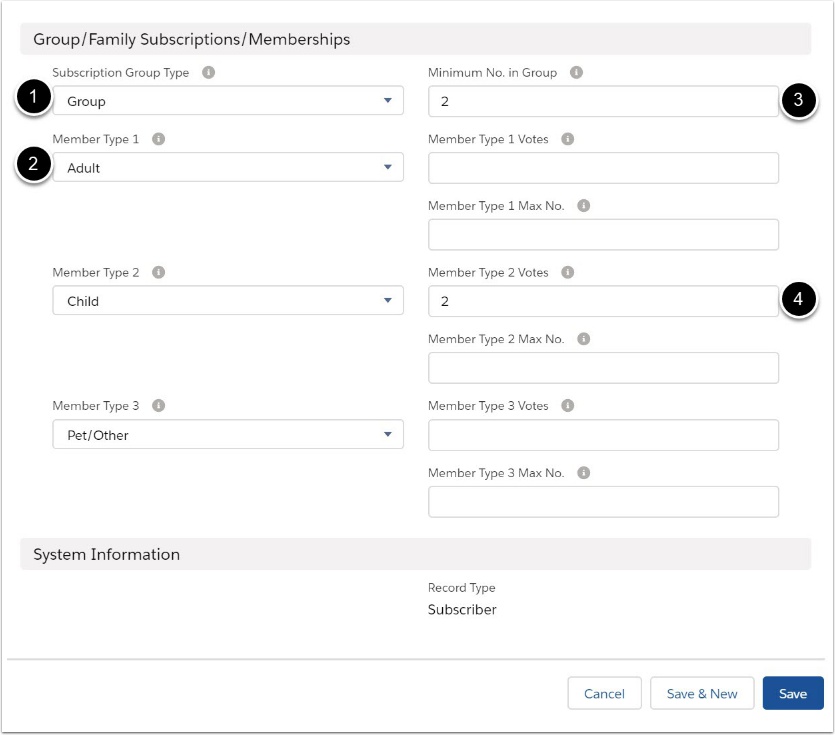
- Select 'Group' - this will set prompts for the web form
- Allocate member types (Adult / Child / Pet)
- Allocate the minimum no of subscribers for the grouping
- Allocate the maximum no of 'Member Type 1' (eg adults) for the grouping
Voting rules can also be set depending upon the rules of your organisation.
Voting rights are assigned on a first entered based by Member Type. Voting can be automatically assigned to non Subscriber Group contacts by simply setting the “Member Type 1 Votes” to “1”.
7. Check your online form
