If you are looking to have a header image on your form that goes all the way across the form and correctly resizes for the mobile device, then you can do this by following the steps in this procedure.
If you later on update the image, then you'll need to repeat the steps in this procedure.
Quick Steps:
- Add your image to the Merchant Facility - Payment Overview.
- Go to your user record. Turn on accessibility mode. SAVE
- Go back and EDIT the Merchant Facility. You’ll see the html instead of the normal editor. Update the image for the style to be “width:100%” (don’t put a height). SAVE.
- Go to your user record. Turn off accessibility mode. SAVE
1. Add your image to the Merchant Facility - Payment Overview

The Merchant Facility tab can be found within the Payments2Us menu (Top right picklist in Salesforce - Select Payments2Us), or it can be found under the "More" at the end of the tabs. (In Salesforce Classic - It can be under the "+" at the end of the tabs)
Once you have clicked on the Merchant Facility Tab, select the appropriate List view (Example: "All Merchant Facilities") and click into Merchant Facility you wish to update.
1.2. Edit the Payment Overview
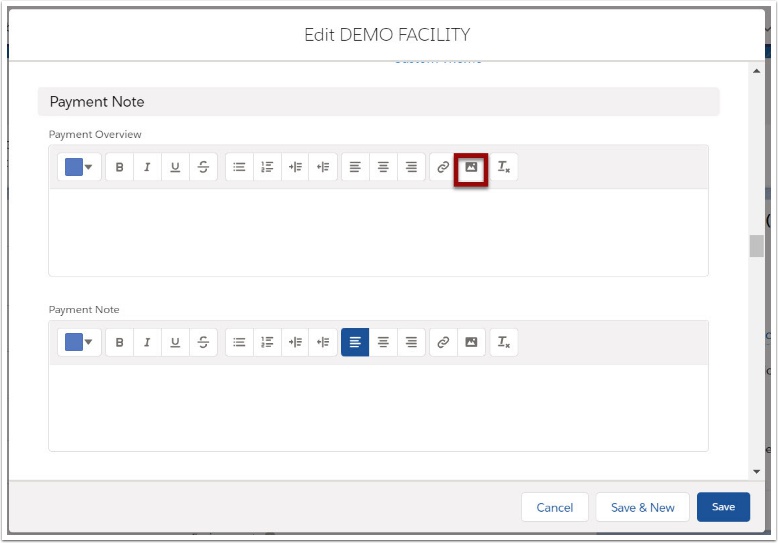
- Press the EDIT button on the Merchant Facility
- Scroll down to the Payment Note Section and place your cursor into the Payment Overview
- Press the Image Icon and select your banner image
1.3. Update other overview notes and Save
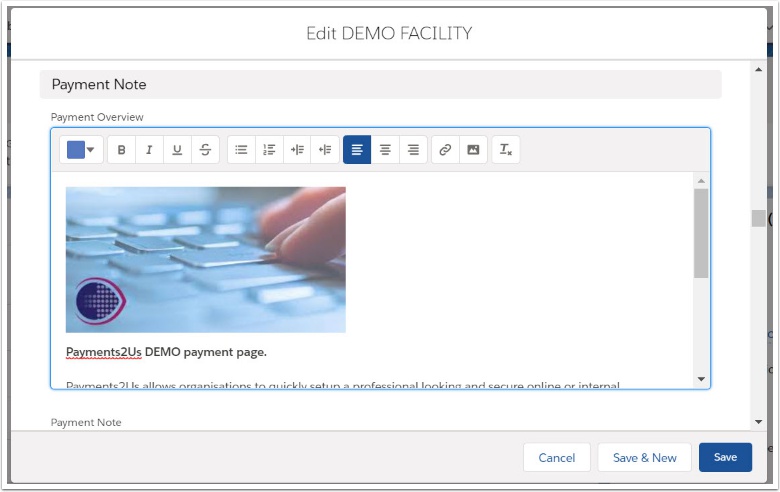
2. Turn ON accessibility mode for your user
2.1. Enable accessibility Mode
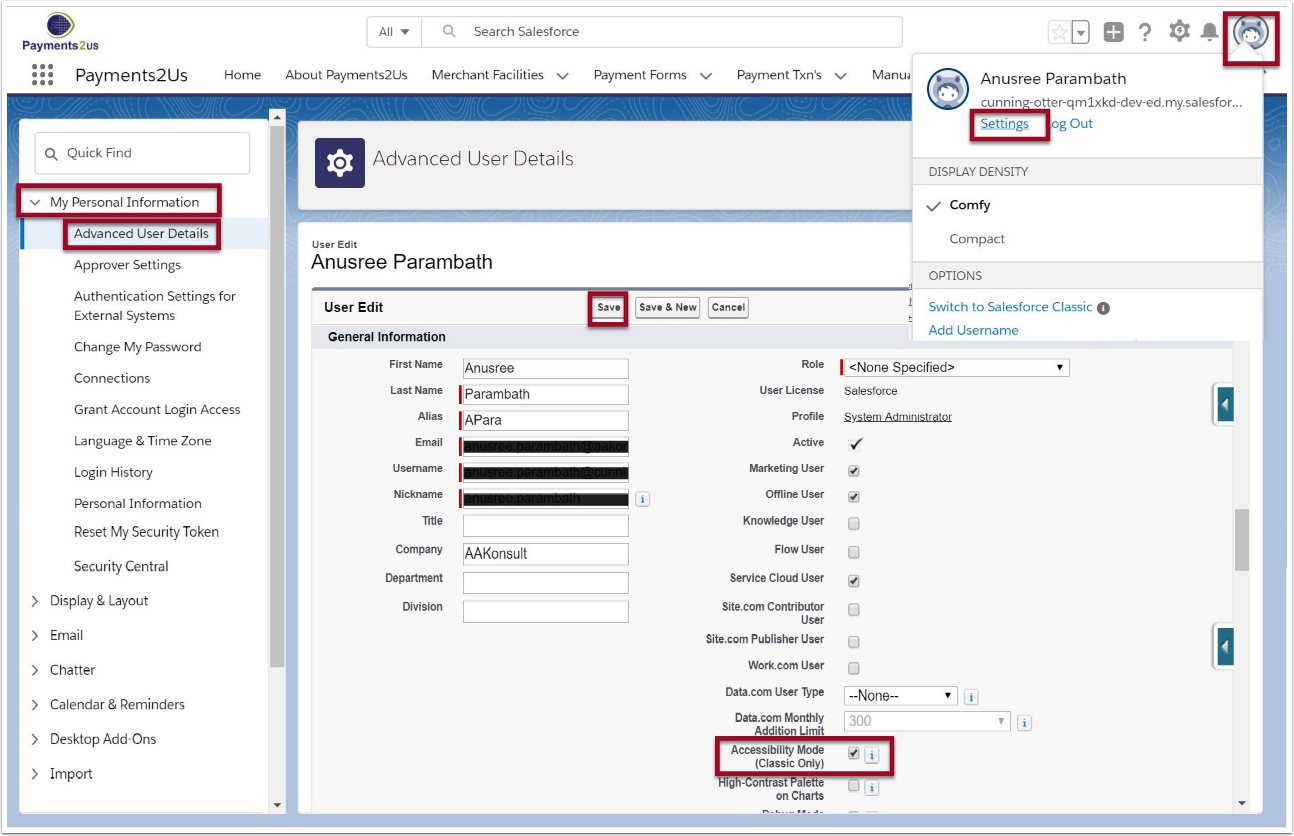
- Navigate to My Personal information
- Select Advanced user setting and EDIT button
- Enable Accessibility Mode and SAVE
3. Go back and EDIT the Merchant Facility

The Merchant Facility tab can be found within the Payments2Us menu (Top right picklist in Salesforce - Select Payments2Us), or it can be found under the "More" at the end of the tabs. (In Salesforce Classic - It can be under the "+" at the end of the tabs)
Once you have clicked on the Merchant Facility Tab, select the appropriate List view (Example: "All Merchant Facilities") and click into Merchant Facility you wish to update.
3.2. Edit the Payment Overview

- Press the EDIT button on the Merchant Facility
- Scroll down to the Payment Note Section and place your cursor into the Payment Overview
In Classic
You will notice this time that the Payment Overview is now in raw html.
You'll need to locate the item that has style="width:...." (Then update as per the next step)
In Lightning
You will notice that the image is still available in Lightning.
3.3. Make the image width 100%
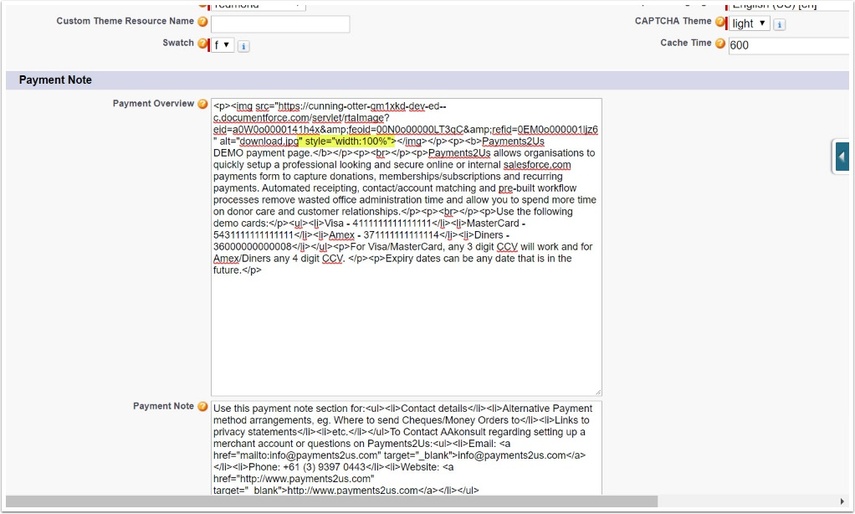
Update the style to be 100%. The html code for this is: style="width:100%;"
SAVE
4. Turn OFF accessibility mode for your user
4.1. Disable accessibility Mode
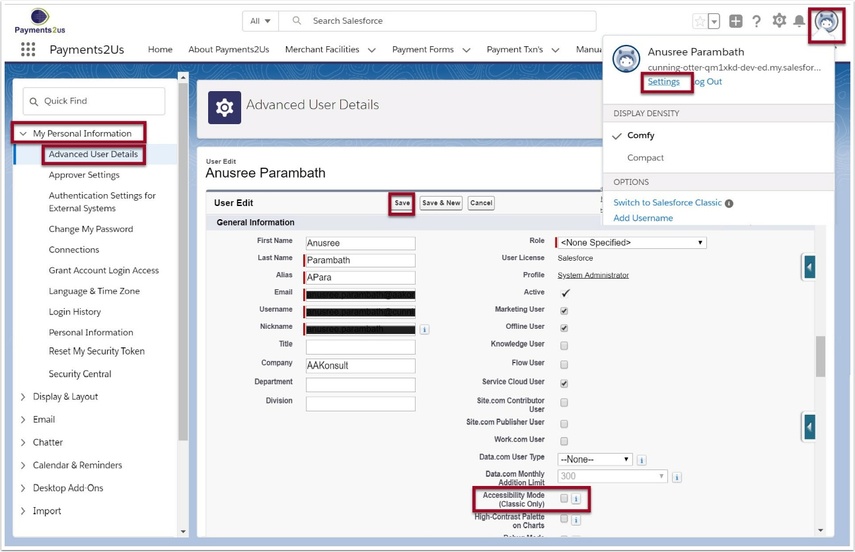
- Navigate to My Personal information
- Select Advanced user setting and EDIT button
- Disable Accessibility Mode and SAVE