This article is applicable only after Payments2Us version 10.2 onwards
For assistance on this option over and above what is shown in this user guide will require Payments2Us Premium Support.
Following are some advance changes that can be done on the checkout Payment form:
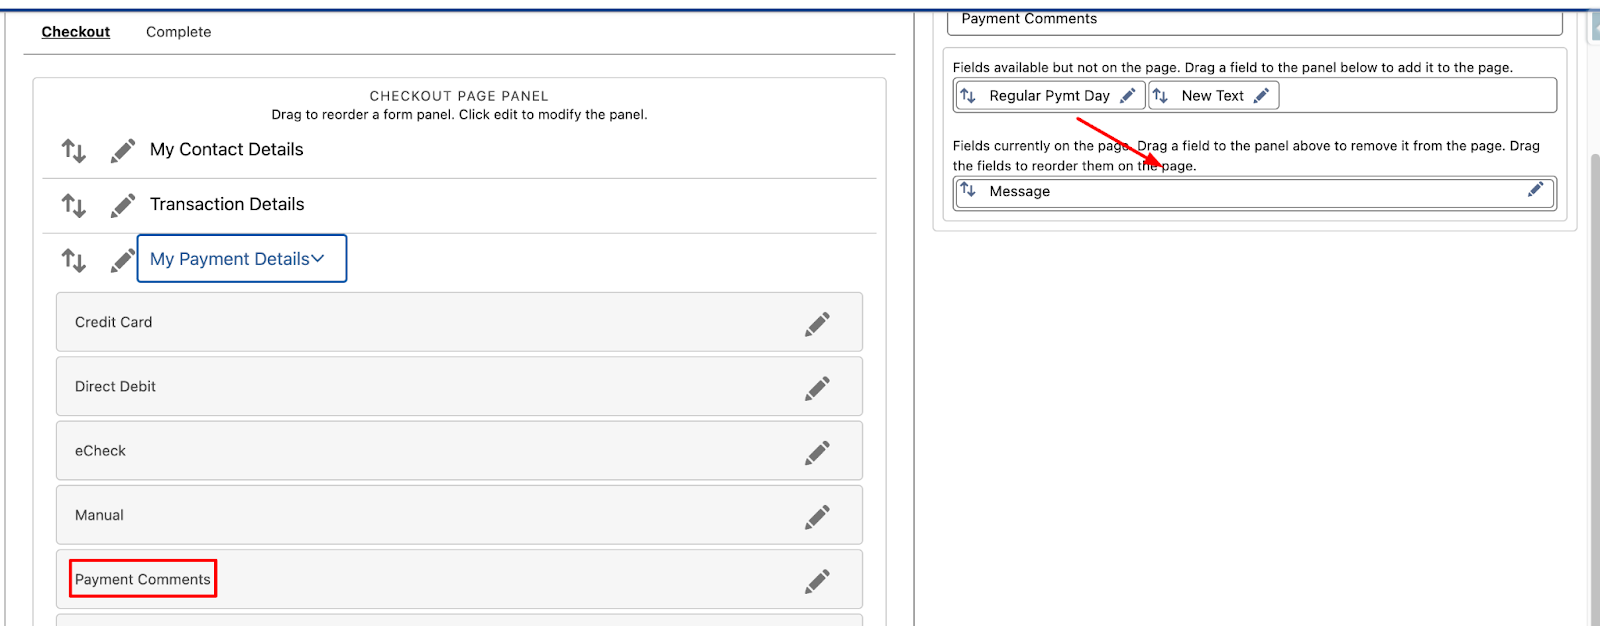
Regular Payment Day in Payments Section
Regular Payment Day field can be shown in the Payments section instead of Transaction details section.
Following changes need to be done in order to accomplish this:
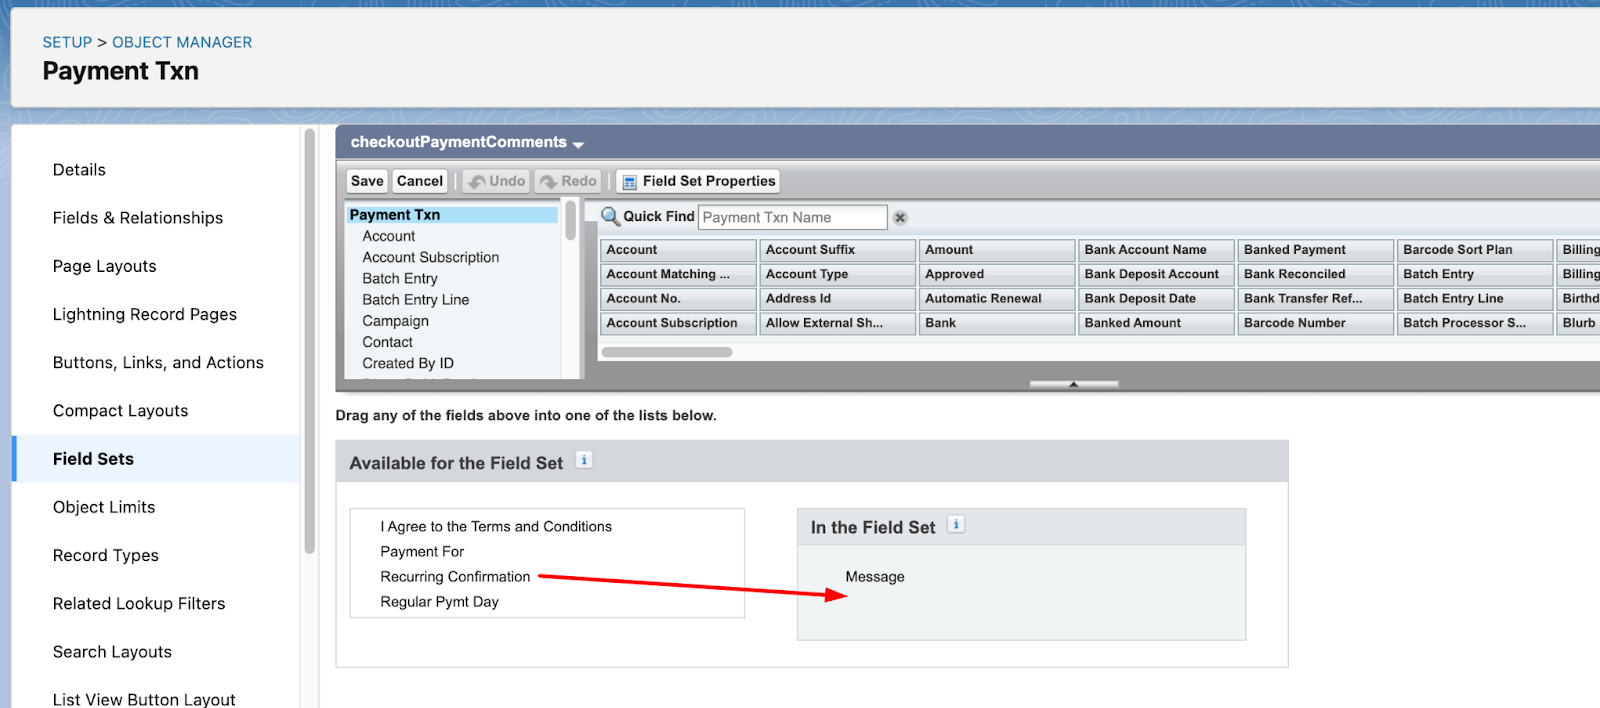
- Move “Regular Pymt Day” field from “Available” to “In the Feld Set” section of “checkoutPaymentComments” field set.
- In the payment form builder, Add “Regular Pymt Day” field in the Payment Comments subsection.
- Make sure the “hideTransDetails” parameter is set to true for the checkout form.
- Also Payment frequency is “Monthly”.

Show Placeholders Option
- A new field Field Label Options is introduced on the payment form. Select the option to display either field labels or placeholders or both.

Amount and Frequency in Payment Form Button & Custom Text
-
Amount and Frequency can be shown on the payment form's submit button. Also custom text can also be added to show donation message.

- For showing amount and payment frequency inside the button, custom label need to be updated.
- Go to Setup → Search for “Custom Labels” in left search bar → Open it.
- Look for Checkout_Label_Donate_Now custom label.
- Add {0} and {1} in the value of the custom label.
- {0} in the text will be replaced with amount.
- {1} in the text will be replaced with frequency.
- Example “Donate {0} {1}” will become “Donate 30$ Monthly”.
- In case of One-Off transaction, {1} gets replaced by “Once” by default (e.g. "Donate 30$ Once). If you want to change this , the update the value of Checkout_Donate_Now_Once_Text custom label.

- For showing amount and payment frequency as a text message in the form, another custom label need to be updated.
- Go to Setup → Search for “Custom Labels” in left search bar → Open it.
- Look for Checkout_Recurring_Donation_Message custom label.
- Replace “No Message” with your custom message and add {0} and {1} in the value of the custom label.
- {0} in the text will be replaced with amount.
- {1} in the text will be replaced with frequency.
- Example “You are donating {0} {1}” will become “You are donating 30$ Monthly”.

Recurring Confirmation Check
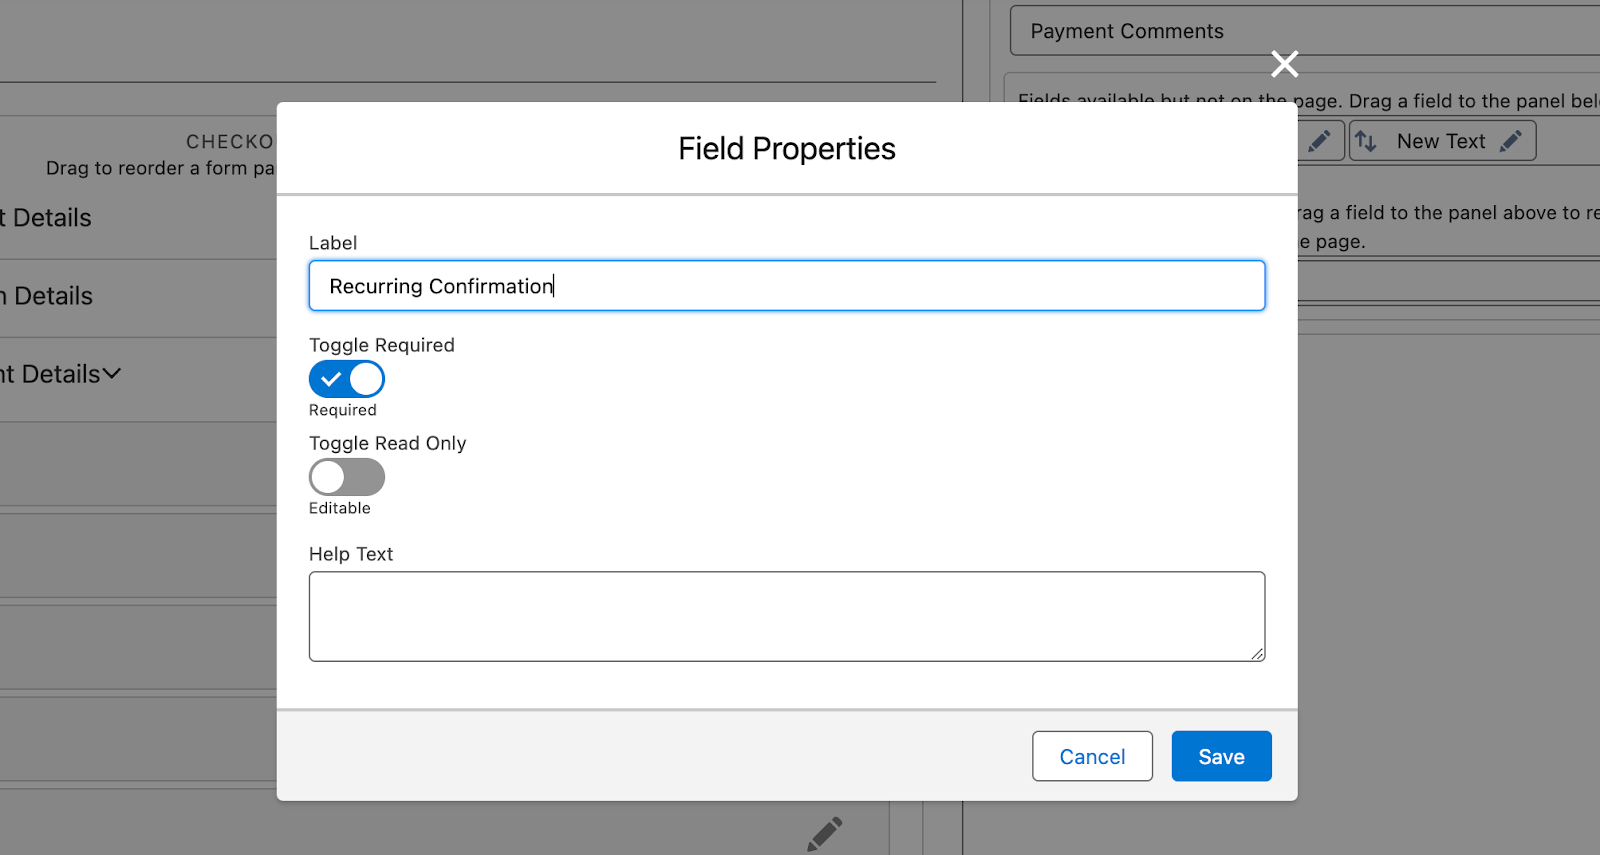
- A new checkbox field “Recurring Confirmation” is introduced on the Payment Txn object. It can be used as a confirmation field before submitting the form.

- Following are steps needed to add this checkbox to your payment form:
- Go to “Setup” and then “Object Manager”. Search for “Payment Txn” object. Open it and click on “Field Sets” from the left panel.

- Move “Recurring Confirmation” field from “Available” to “In the Feld Set” section of “checkoutPaymentComments” fieldset.
- In the payment form builder, Add “Recurring Confirmation” field in the Payment Comments subsection.
- For checkbox label, click on the pencil icon next to the field and update the label, also mark the field as required.
- Go to “Setup” and then “Object Manager”. Search for “Payment Txn” object. Open it and click on “Field Sets” from the left panel.

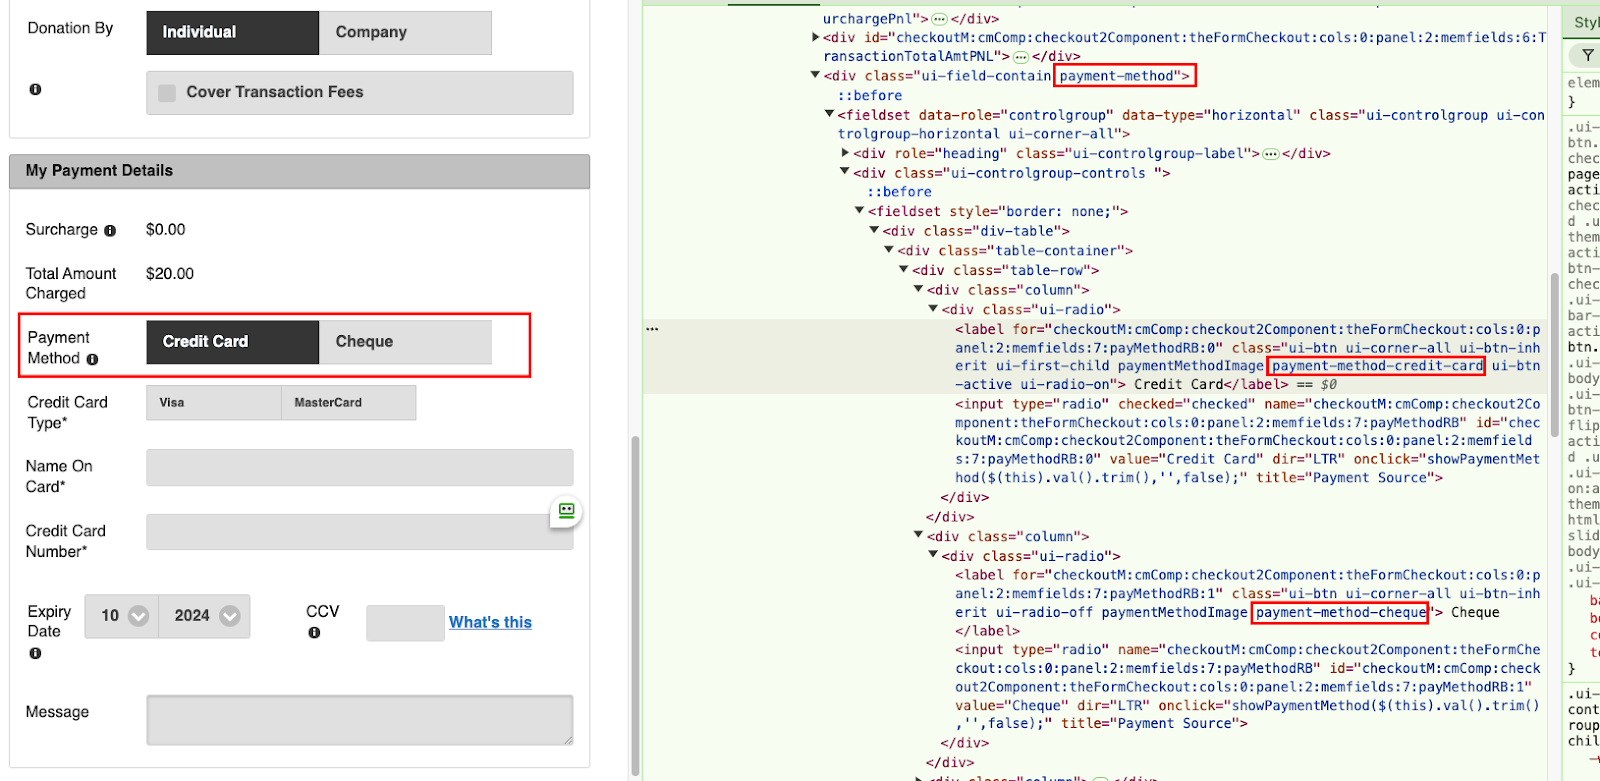
Add Icons in Payment Method
- Add icons in the payment method options using external stylesheets.
- Following are steps to add the icons:
- A new CSS class gets added in the label of each payment method option.
- The pattern of CSS class is payment-method-NameofPaymentMethod. Example: payment-method-credit-card , payment-method-cheque etc.
- This CSS class can be used to add image in the option. Example:
.payment-method .payment-method-credit-card {
Background-image: URL(.......Image Url…..)
}
- Once URLs are added then the images will be rendered as follows: