1. Locate your Datatrans API username/password details
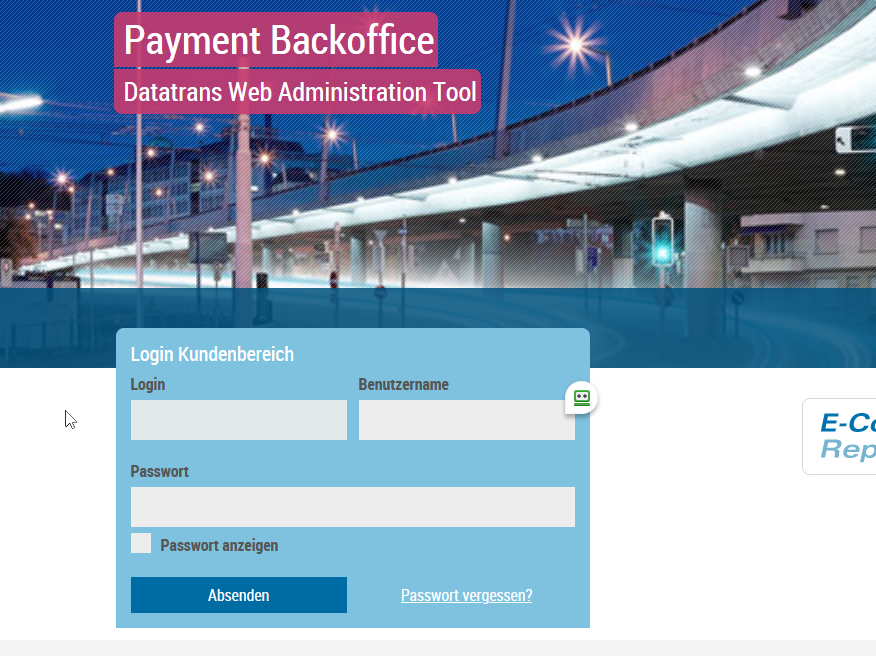
Login into your Datatrans Portal
For Production accounts, this is at: https://admin.datatrans.com/
For Test accounts, this is at: https://admin.sandbox.datatrans.com/
2. Setup Server credentials
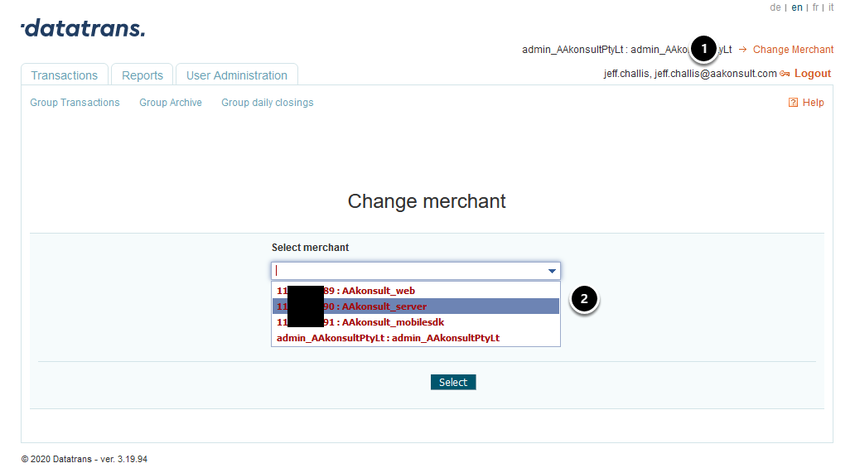
- Click on the "Change Merchant" link
- Select the merchant that has "_server" in the name and then press the "Select" button
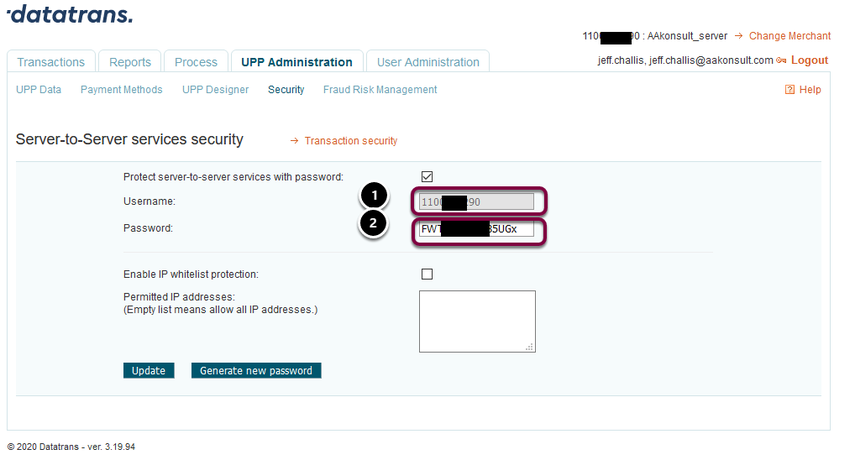
- Click on "UPP Administration Tab"
- Click on "Security" sub tab
- Click on the "-> Server-to-Service services security" link

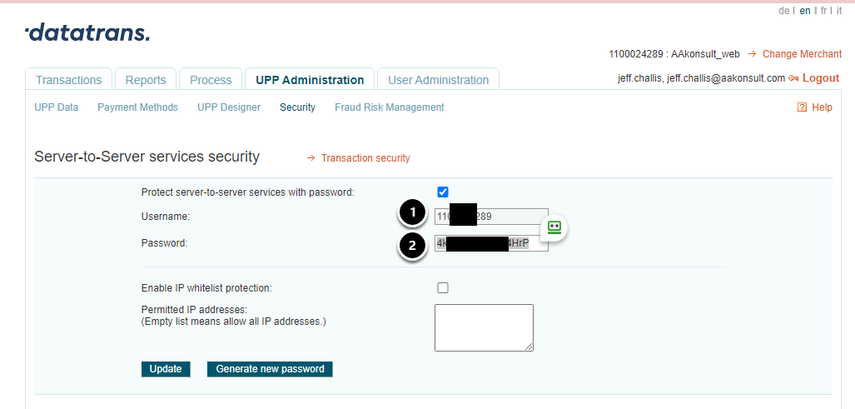
Copy the username (1) and Password (2). You'll need enter these into the Merchant Facility in Salesforce.
2.1. Update API User details on the Merchant Facility
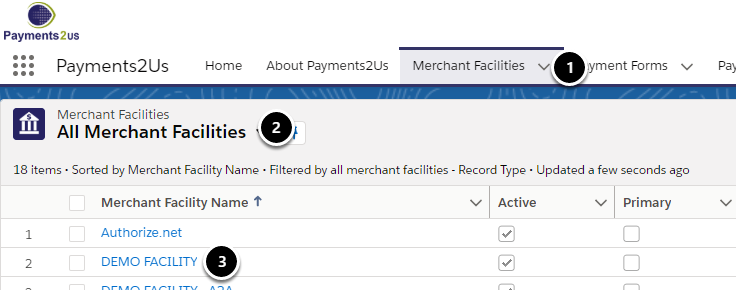
Navigate to the Merchant Facility Tab.
Select all Merchant Facilities and click into the one you wish to use with Datatrans
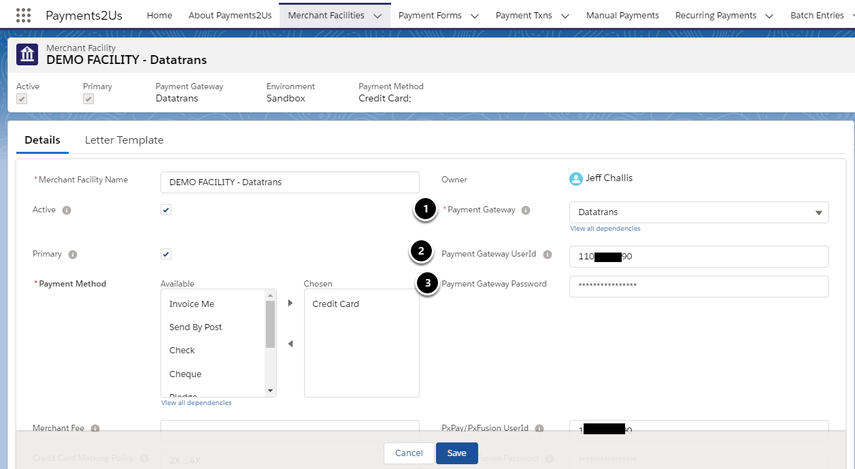
- Select Datatrans as the Payment Gateway
- Enter the Username copied from the previous section into "Payment Gateway UserId"
- Enter the Password copied from the previous section into the "Payment Gateway Password"
Press SAVE button
3. Setup Web credentials
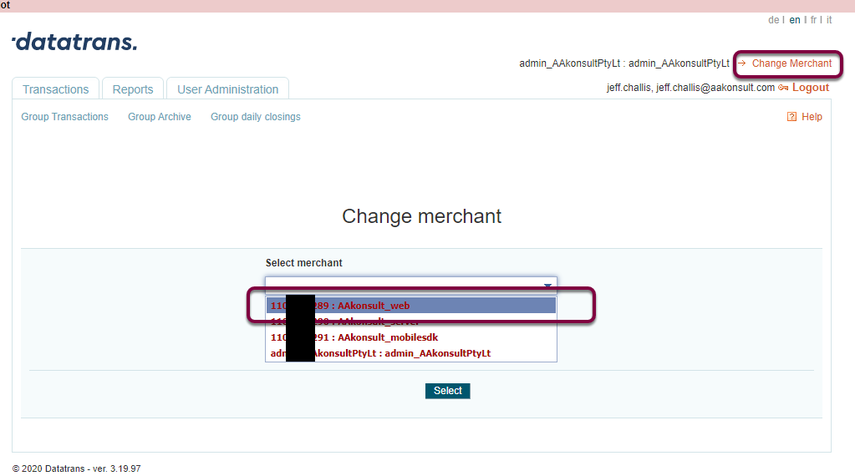
- Click on the "Change Merchant" link
- Select the merchant that has "_web" in the name and then press the "Select" button
- Click on "UPP Administration Tab"
- Click on "Security" sub tab
- Click on the "-> Server-to-Service services security" link
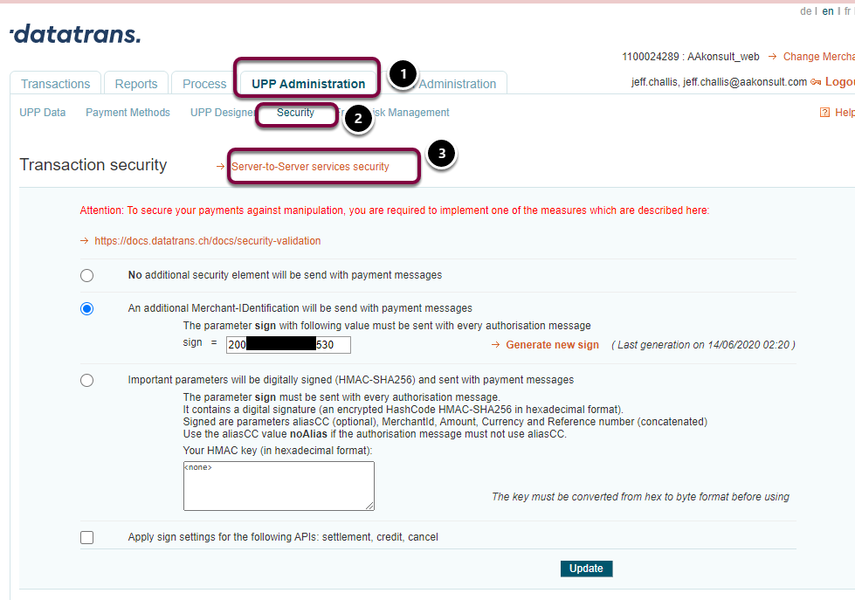
Copy the username (1) and Password (2). You'll need enter these into the Merchant Facility in Salesforce.
3.1. Update API User details on the Merchant Facility
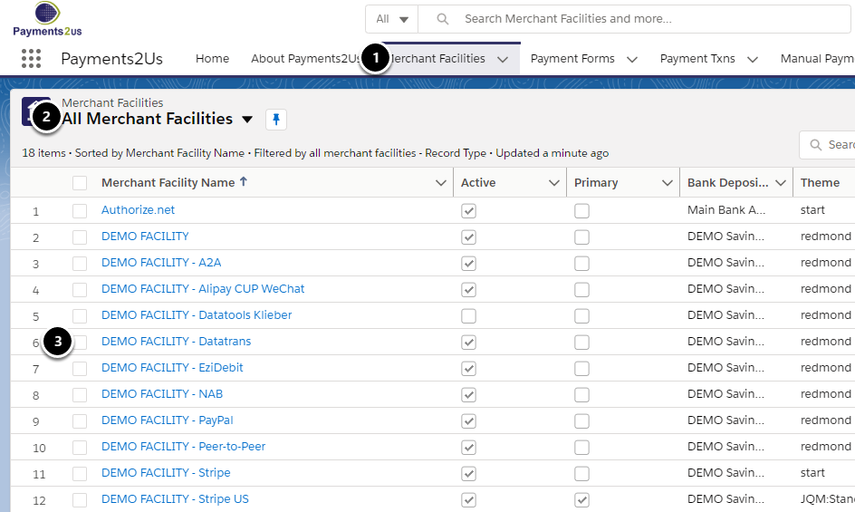
Navigate to the Merchant Facility Tab.
Select all Merchant Facilities and click into the one you wish to use with Datatrans
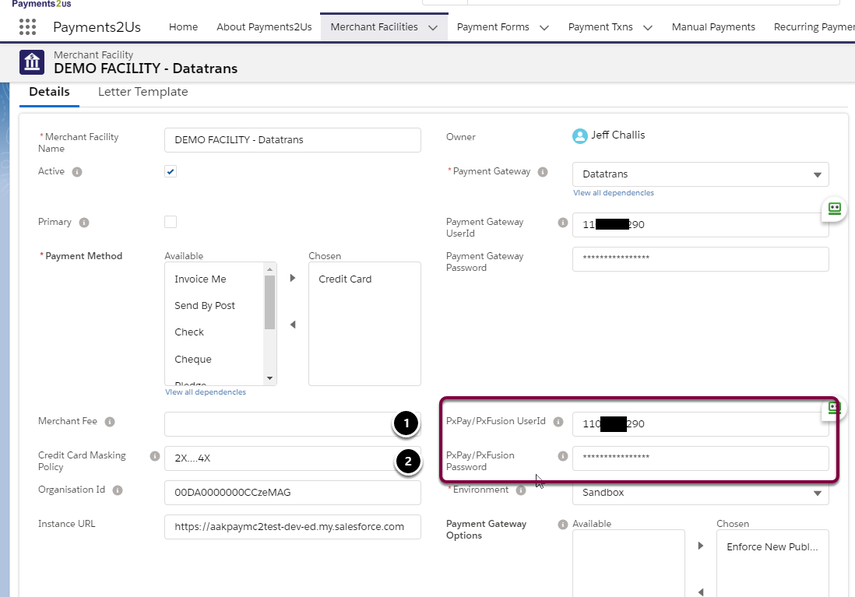
- Enter the Username copied from the previous section into "PxPay/Px Fusion UserId"
- Enter the Password copied from the previous section into the "PxPay/Px Fusion Password"
NOTE: This is the second lot of username/passwords on the form and NOT the first set.
Press SAVE button
4. Datatrans required settings update
In order for Datatrans to work from buttons inside Salesforce, the following settings need to be applied.
4.1. Enable and locate My Domain Setting
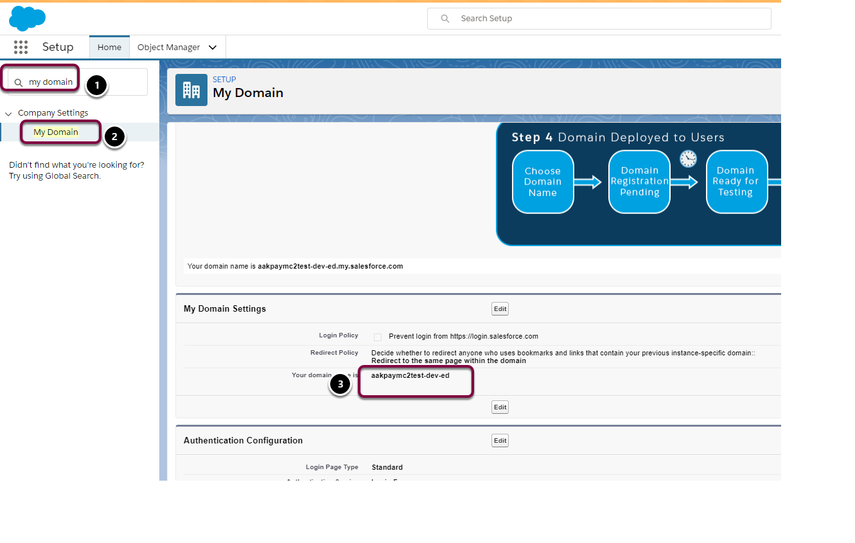
Navigate to setup - Search "My Domain" (1) and click into the My Domain menu option (2).
If My Domain is not enabled, the enable it.
Copy the My Domain (3) as you'll need this for the next step.
4.2. Whitelist your My Domain in Sessions Settings
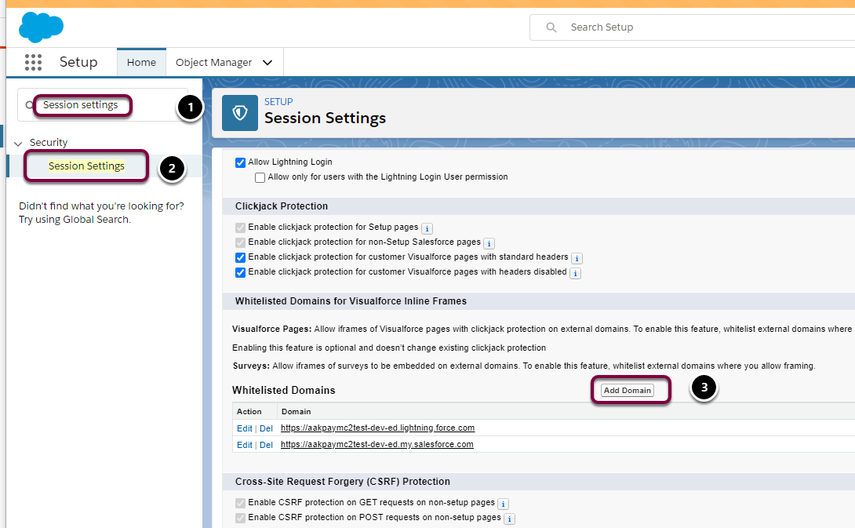
Navigate to setup - Search "Session Settings" (1) and click into the Session Settings menu option (2).
You will need to add two new entries by pressing the "Add Domain" button (3)
