If your organisation has enabled "Secure guest user record access" on Sharing Settings, or the date is after 2nd March 2020, then the below procedure is no longer applicable. Please use procedure: How to set up external site security for payments
If your organisation needs to have certain information only visible to certain users and teams, you can adjust permissions using Sharing Settings.
Salesforce is based on Owner securities. For each record, there is an owner, and it can be set that only that user can see it.
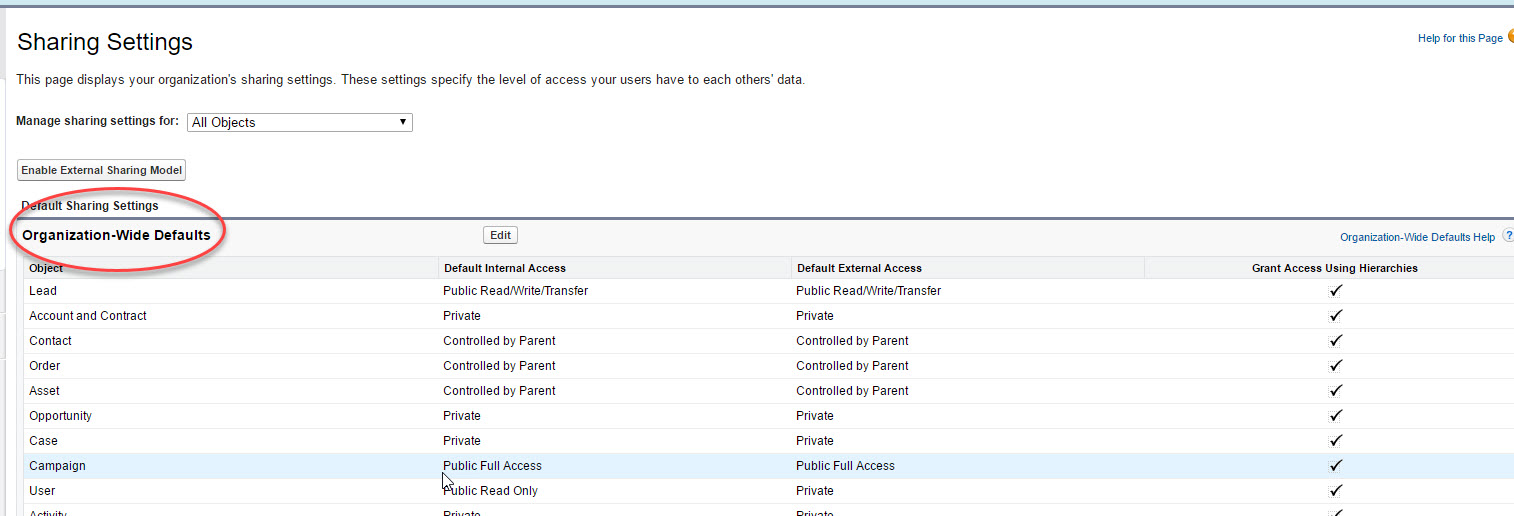
This is where to start, as these settings are Organisation-Wide Defaults and will affect all users. You can then create rules to create exemptions and different settings afterwards, depending on profile, hierarchy, teams, etc.
There are various settings, with most Objects having Read/Write, Read Only and Private options. There are other settings that are unique to specific Objects such as Controlled by Parent.
Setting up Org Wide Defaults
- Go to Setup and enter 'Sharing Settings' in the search box. Select Sharing Settings. The top of the Page shows Organisational Default Settings.
- Change the Object settings to what suits your organisation.

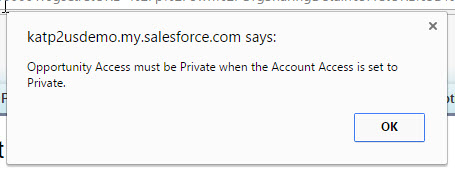
Note: Some related Objects will need to be changed if other Objects settings are set to a higher restriction eg: Changing Account and Contact to Read only or Private will change other objects such as Opportunities and Cases to the same setting. A window will pop up, click OK to allow the setting changes. Note: Related Objects will not be set to a lower restriction, if an Object's settings are made more public. Those related Objects' settings will need to be adjusted manually.
- If you want to make adjustments to specific Objects, scroll down and click New Rule in the Object you want to change.
Setting up a Public Group
A public group is required so that the public website user can have access to the records owned by internal Salesforce users.
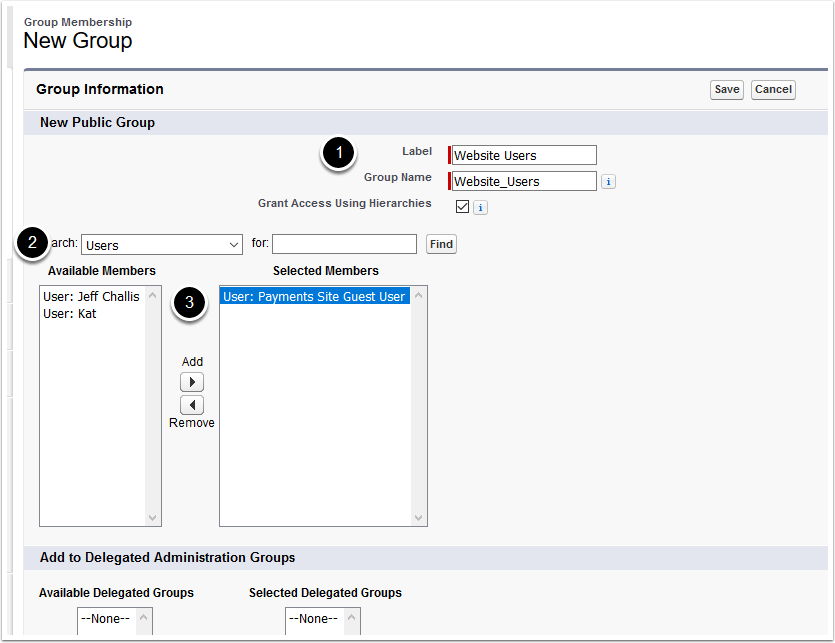
To setup a new public group, navigate to Public Groups in Setup by searching for 'Public Groups'. Press New to create a new Group

- Enter a name
- Select Users from the picklist options
- Select and assign the Public Sites User. Note, this is the user that was setup with the public facing website. This is the user mentioned in section six of procedure How to set up external site security (Classic version). Another way to identify this user is it will have a name/label that is not like a normal staff member/users name.
Assigning Account Sharing Rules
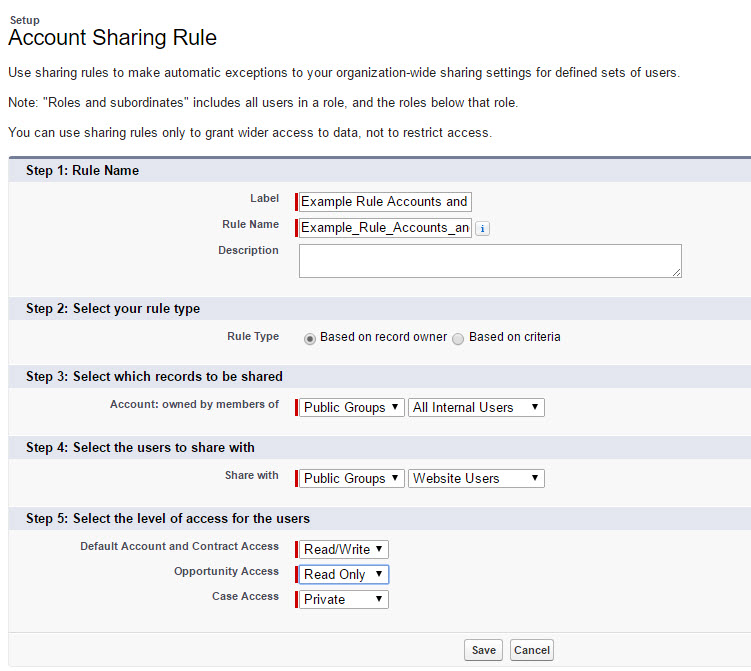
Account sharing rules will enable the Public Website form/user to access the internal Accounts and Contacts
Go to Setup and enter 'Sharing Settings' in the search box. Select Sharing Settings. Scroll down to the related list "Account Sharing Rules" and press New.
Follow the steps listed in the set up. Rule Types can be based on record owner or criteria.

Click Save. The new rule will appear under the Object sharing settings.

See also: Private Account and Contacts FAQ